What is Hc7 ransomware? And how does it function?
Hc7 ransomware is a new version of the Hc6 ransomware. It infects users by hacking into Windows computers that are running publicly accessible Remote Desktop services. Once the cyber criminals behind Hc7 ransowmare get a hold of the targeted computers, it installs the ransomware on all the accessible computers in the network.
This new variant appeared only a few days after hc6 ransomware was released. Security experts were able to develop a free decryptor for its victims since it was decryptable. Unfortunately just a few days later, the developers of this ransomware released this new version of hc6 ransomware which unluckily is not decryptable as the crooks removed the hard coded encryption key and switched to inputting the encryption key as a command line argument instead. If you are another victim of hc7 ransowmare, worry not as there might still be a way to recover your files.
Cyber criminals behind hc7 ransomware are hacking into the exposed remote desktop services where they use PsExec to install the ransomware infection to the computers in the network. Hc7 ransomware uses AES 256 encryption algorithm in encrypting files which have the following extensions:
.3dm, .3g2, .3gp, .7zip, .aaf, .accdb, .aep, .aepx, .aet, .ai, .aif, .as, .as3, .asf, .asp, .asx, .avi, .bmp, .c, .class, .cpp, .cs, .csv, .dat, .db, .dbf, .doc, .docb, .docm, .docx, .dot, .dotm, .dotx, .dwg, .dxf, .efx, .eps, .fla, .flv, .gif, .h, .idml, .iff, .indb, .indd, .indl, .indt, .inx, .jar, .java, .jpeg, .jpg, .js, .m3u, .m3u8, .m4u, .max, .mdb, .mid, .mkv, .mov, .mp3, .mp4, .mpa, .mpeg, .mpg, .msg, .pdb, .pdf, .php, .plb, .pmd, .png, .pot, .potm, .potx, .ppam, .ppj, .pps, .ppsm, .ppsx, .ppt, .pptm, .pptx, .prel, .prproj, .ps, .psd, .py, .ra, .rar, .raw, .rb, .rtf, .sdf, .sdf, .ses, .sldm, .sldx, .sql, .svg, .swf, .tif, .txt, .vcf, .vob, .wav, .wma, .wmv, .wpd, .wps, .xla, .xlam, .xll, .xlm, .xls, .xlsb, .xlsm, .xlsx, .xlt, .xltm, .xltx, .xlw, .xml, .xqx, .xqx, .zip.
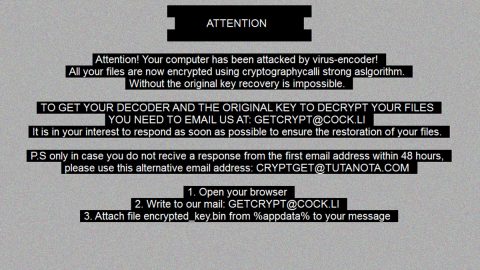
Once the ransomware is able to cover the encryption process, it appends the .GOTYA extension on each one of the files. It also creates a ransom note in a text file which is named RECOVERY.txt and places it on every folder where there is an encrypted file. Here’s the content of the ransom note:
“ALL YOUR FILES WERE ENCRYPTED.
ORDER, TO RESTORE THIS FILE, YOU MUST SEND $700 BTC for MASCHINE OR $5,000 BTC FOR ALL NETWORK
[Bitcoin wallet address] AFTER PAYMENT SENT EMAIL [email protected].
FOR INSTALLATION FOR DECRIPT
NOT TO TURN OFF YOUR COMPUTER, UNLESS IT WILL BREAK”
The Bitcoin address included in the ransom note will be selected randomly from 1-14 Bitcoin addresses. The good thing is that even though the encryption key is inputted into the program as a command line argument, you can still recover your encrypted files using memory forensics. Because of memory forensics, security experts were able to come up with another way to decrypt the files.
How does Hc7 ransomware proliferate?
As you already know, Hc7 ransomware attack is held by hacking into poorly protected or public remote desktop services. After the hacking, the cyber crooks install PsExec to download and install Hc7 ransomware’s malicious executable file named hc7.exe.bin. To avoid these kinds of attacks, make sure that you set up a firewall, use a secure VPN connection when connecting to the internet and install a trusted and reliable antivirus program like SpyRemover Pro.
Refer to the removal guide provided below to terminate Hc7 ransomware and all the malicious files it created.
Step 1: Restart your PC into Safe Mode with Networking.
Step 2: Once your computer is done rebooting, tap Ctrl + Shift + Esc to pull up Windows Task Manager and look for Hc7 ransomware’s malicious process such as hc7.exe.bin and end it.

Step 3: Open Control Panel by pressing the Windows key + R, then type in appwiz.cpl and then click OK or press Enter.
Step 4: Look for Hc7 ransomware or any suspicious program and then Uninstall it/them.

Step 5: Tap Win + E keys to launch File Explorer.
Step 6: Navigate to the following locations below and look for Hc7 ransomware’s malicious components such as PsExec and hc7.exe.bin as well as all the copies of RECOVERY.txt and then delete all of them.
- %TEMP%
- %APPDATA%
- %USERPROFILE%\Desktop
- %USERPROFILE%\Downloads
- %ALLUSERPROFILE%\Start Menu\Programs
- %APPDATA%\Microsoft\Windows\Start Menu\Programs
- %USERPROFILE%\Microsoft\Windows\Start Menu\Programs
- %ALLUSERPROFILE%\Microsoft\Windows\Start Menu\Programs
- %ALLUSERPROFILE%\Application Data\Microsoft\Windows\Start Menu\Programs
Step 7: Close the File Explorer. Before you proceed to the next steps below, make sure that you are tech savvy enough to the point where you know exactly how to use and navigate your computer’s Registry. Keep in mind that any changes you make will highly impact your computer. To save you the trouble and time, you can just use PC Cleaner Pro, this system tool is proven to be safe and excellent enough that hackers won’t be able to hack into it. But if you can manage Windows Registry well, then by all means go on to the next steps.
Step 8: Tap Win + R to open Run and then type in regedit in the field and tap enter to pull up Windows Registry.

Step 9: Navigate to the following path:
- HKEY_CURRENT_USER\SOFTWARE\Microsoft\Windows\CurrentVersion\Run
- HKCU\SOFTWARE\Microsoft\Windows\ CurrentVersion\Run
- HKLM\SOFTWARE\Wow6432Node\Microsoft\Tracing\
- HKLM\SOFTWARE\Microsoft\Tracing\
Step 10: Delete the registry keys created by Hc7 ransomware.
Step 11: Close the Registry Editor and empty your Recycle Bin.
To make sure that nothing is left behind and that the Hc7 is completely removed, use the following antivirus program. To use it, refer to the instructions below.
Perform a full system scan using SpyRemover Pro. To do so, follow these steps:
- Turn on your computer. If it’s already on, you have to reboot
- After that, the BIOS screen will be displayed, but if Windows pops up instead, reboot your computer and try again. Once you’re on the BIOS screen, repeat pressing F8, by doing so the Advanced Option shows up.

- To navigate the Advanced Option use the arrow keys and select Safe Mode with Networking then hit
- Windows will now load the Safe Mode with Networking.
- Press and hold both R key and Windows key.

- If done correctly, the Windows Run Box will show up.
- Type in explorer http://www.fixmypcfree.com/install/spyremoverpro
A single space must be in between explorer and http. Click OK.
- A dialog box will be displayed by Internet Explorer. Click Run to begin downloading the program. Installation will start automatically once download is done.

- Click OK to launch it.
- Run SpyRemover Pro and perform a full system scan.

- After all the infections are identified, click REMOVE ALL.

- Register the program to protect your computer from future threats.